Locking Preferences
Use the Locking tab to lock and unlock Dante Via.
Locking Dante Via prevents accidental changes to audio routing, and prevents remote users from changing the routing configuration with Dante Controller.
When Dante Via is locked, the main UI becomes read-only – however, the Mute All button, Stop / Start button and main menus are still enabled. In the preferences, all controls are disabled except the ‘check for updates’ controls, the performance tracing feature and the Unlock button.
You can lock and unlock Dante Via locally using the UI, or remotely using Dante Controller.
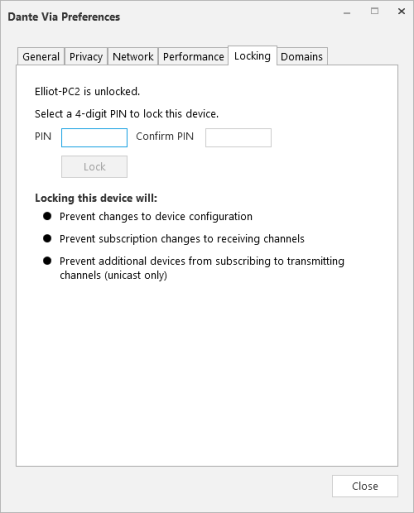
To lock Dante Via using the UI:
- Navigate to the main menu > Preferences.
- Select the Locking tab.
- In the PIN field, enter a 4-digit PIN.
- In the Confirm PIN field, enter the same PIN.
- Click Lock.
A lock icon is displayed in the main UI which can be used to open the preferences at the Locking tab.
To unlock Dante Via using the UI:
- Click the lock icon, or go to the main menu > Preferences and select the Locking tab.
- Click Unlock.
For information about using Dante Controller to lock and unlock Dante Via, see the